If you need to wrap text in PowerPoint, you may find yourself lost because it is not an easy task to do without a proper guideline. Many other applications have really intuitive page layout settings and wrapping up text around different objects is easy as a pie. However, PowerPoint doesn’t support that option so you need to use workaround solutions.
How to wrap text around a shape in PowerPoint
You can manually wrap text by clicking on the shape (object) you inserted in PowerPoint with the right mouse button and selecting the option “Send to Back”. You can either insert the object first and then the text or vice versa.

Another way to wrap text in PowerPoint is to drag the whole text box close to the shape.
Press the space or back key on the keyboard as many times as you need, to move the text in the text box so it fits right to the shape. You need to repeat the process for every line of the text.
How to wrap text around a table in PowerPoint

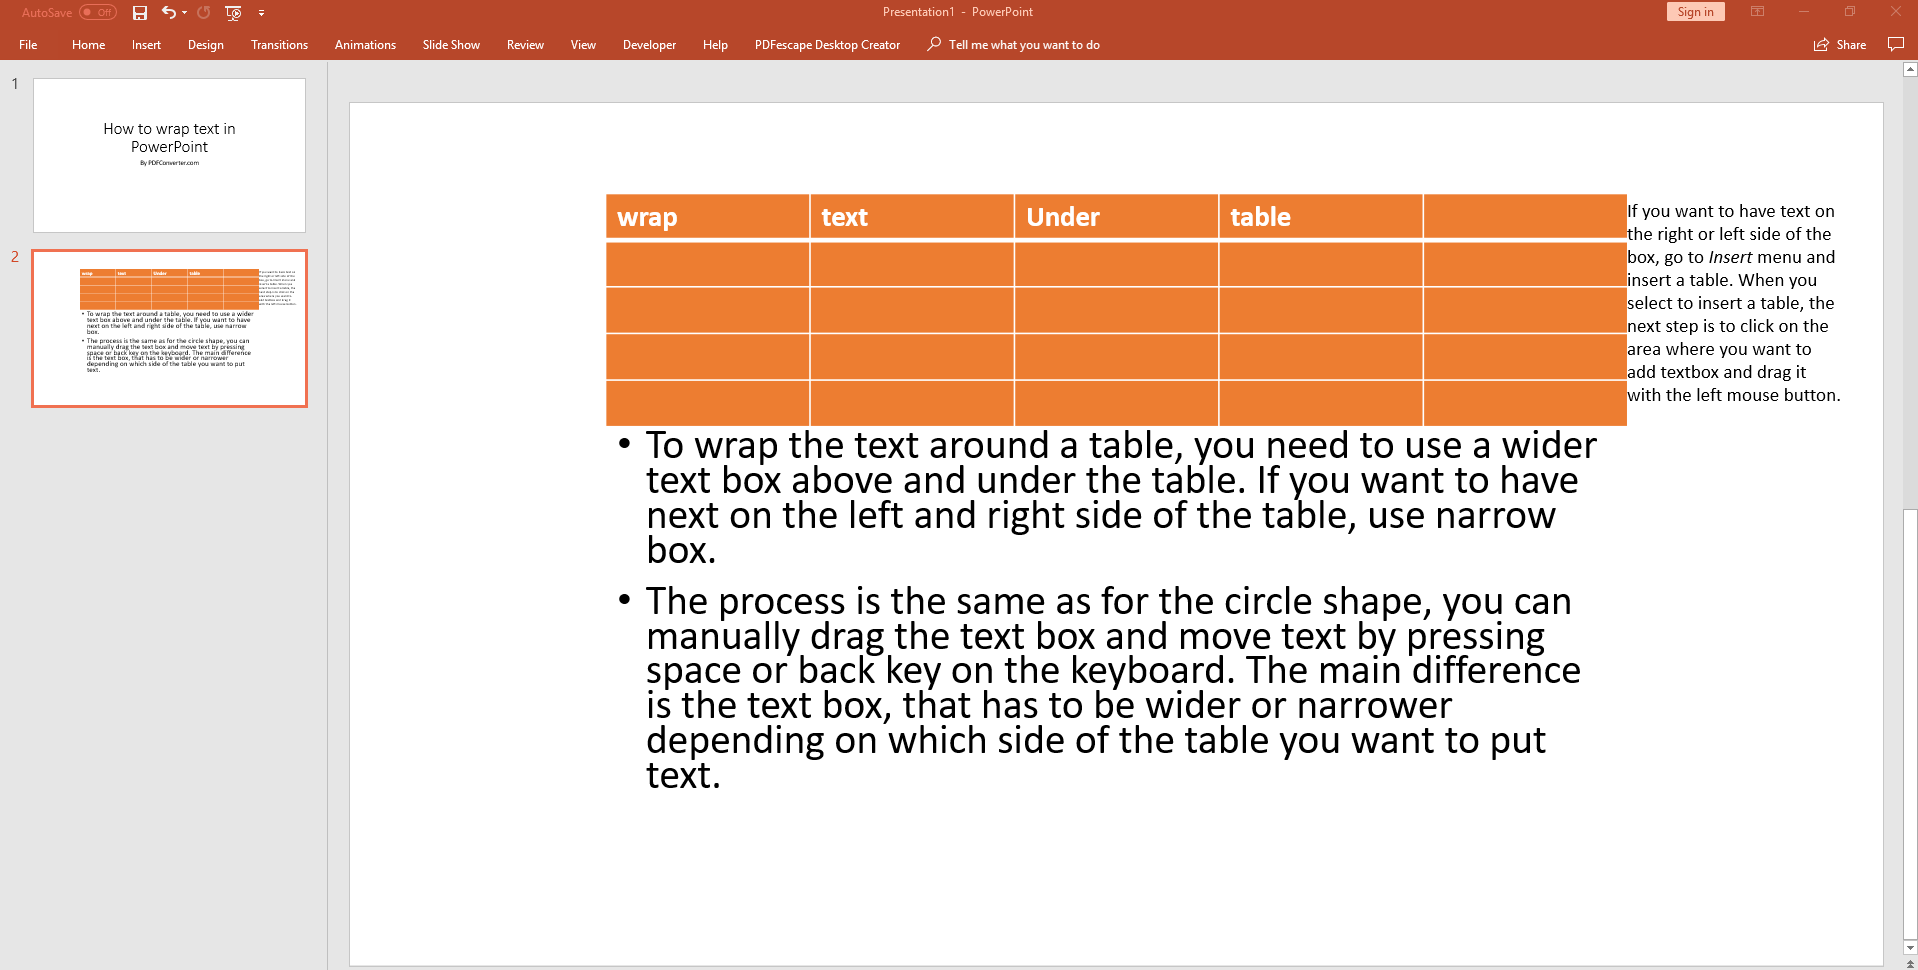
To wrap the text around a table, you need to use a wider text box above and under the table. If you want to have next on the left and right side of the table, use narrow box.
The process is the same as for the circle shape, you can manually drag the text box and move text by pressing space or back key on the keyboard. The main difference is the text box, that has to be wider or narrower depending on which side of the table you want to put text.
The good news is that you can easily change the text box, by dragging it left or right, up or down, it can look narrow or wide. If you want to have text on the right or left side of the box, go to Insert menu and insert a table. When you select to insert a table, the next step is to click on the area where you want to add textbox and drag it with the left mouse button.
Watch out!
If your text font is too big and the text box small, you need to change font so the text fits in the box. Select the whole text and a small window will pop up where you can play with text settings and change font.
Wrapping text around an image in PowerPoint

When you insert an image in PowerPoint presentation, it might happen that it overlaps with your text. To fix this problem, do this before adding the text:
- press Shift-ENTER on the keyboard to add a line break
This will prevent the text from overlapping with the image.
If text stills overlaps, make additional lines in it by hitting the Enter key for every new line. If you don’t want to have bullet point in every line of the text, hit the backspace.
Import Wrapped Text From Microsoft Word

Users of PowerPoint 2013 and 2016 can import wrapped text from Word directly in PowerPoint. Start by opening a slide where you want to wrap text in PowerPoint. In the Insert menu click to insert Object.
In the list of objects, click on “create from file” and find your Word document where the wrapped text is. If you don’t have it, choose other option to “create a new file” and select the corresponding version of Word.
Now click OK and the new window will open, that will be your Word document. In that window insert the image and text. You can click on the image with the right mouse button and select the option to wrap text tight. After that, you will see the PowerPoint slide and how the text is wrapped around the image/object. If you need to make changes again, open again the Word window and make necessary changes.
The post How to Wrap Text in PowerPoint appeared first on PCE Blog.